Project Planner Note Book: Stay Organized from Start to Finish
Managing a project of any size often feels like juggling too many balls at once. You have tasks to track, deadlines to meet, and dependencies to manage. Without a solid system, things slip through the cracks. The Project Planner Note Book offers a straightforward, no-nonsense way to keep everything in one place. Its printable nature means you can scale it up as your project grows, adding new sheets whenever you expand your scope. No complicated software, no steep learning curve. Just a clean, flexible tool that adapts to your workflow.
What Makes a Project Planner Note Book Different
Many planners lock you into a fixed number of pages. Once they run out, you either buy a new one or squeeze your notes into margins. The Project Planner Note Book takes a different approach. Because it comes as a high-quality PDF file, you print only what you need. When your project expands, you print another sheet. This flexibility is especially valuable for long-term initiatives or multi-phase efforts where new tasks emerge over time.
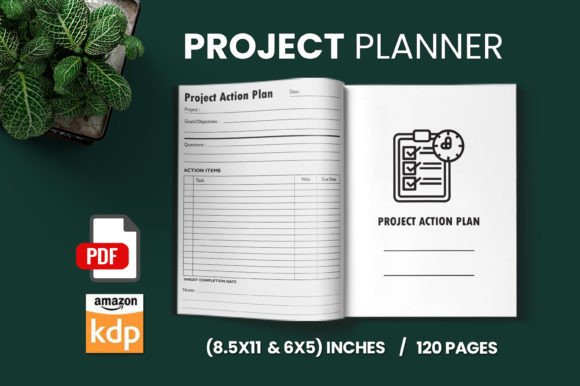
The interior is black and white and minimal by design. No distracting graphics, no unnecessary decoration. Just clean lines and ample space for your dates, tasks, and timelines. This simplicity helps you focus on what matters most: moving your project forward.
Who Benefits from This Type of Planner
This planner suits a wide range of people. Freelancers juggling multiple client projects can track each deliverable without mixing up deadlines. Small business owners managing product launches or seasonal campaigns can map out every step from concept to completion. Educators planning curriculum units or special events can lay out a semester's worth of activities on a single timeline. Bloggers and content creators coordinating editorial calendars will appreciate being able to see an entire campaign at a glance.
Even if you are new to project planning, the straightforward layout invites you to jump right in. There is no intimidating terminology or complex methodology. You simply write down your dates, list your tasks, and estimate how long each one takes. Over time, you develop a clearer sense of how to budget your time and resources.
Practical Benefits of Going Printable
Choosing a printable planner gives you control that a pre-bound notebook cannot match. You decide how many pages to print, which sizes to use, and whether to keep everything in a binder or a folder. The Project Planner Note Book is available in two sizes: 8.5 x 11 inches and 6 x 9 inches. The larger size works well for detailed timelines and spacious task entries. The smaller size is more portable if you prefer to carry your planner with you.
Because the file is printed on demand, you never waste pages. Print one sheet for a quick one-week task list, or print twenty sheets for a year-long rollout. You can also test different layouts before committing to a full system. If you decide to reorganize, just print fresh copies. No erasing, no crossing out, no mess.
How to Use the Project Planner Note Book Step by Step
Getting started takes only a few minutes. First, print the PDF document on standard paper or your preferred stationery. The black-and-white interior prints cleanly on any printer and keeps ink costs low. Next, fill in the dates under the days. If your project extends beyond the timeframe shown on one sheet, simply use additional sheets and continue the date sequence. This is where the expandable nature of the planner really shines.
Once your dates are in place, write in your tasks and activities. Be as specific or as general as you like. For a home renovation, you might list "order materials," "demolition," "electrical rough-in," and "final inspection." For a marketing campaign, you could write "draft copy," "design visuals," "review and approve," and "publish." Finally, fill in the number of days you expect each task to take. This gives you a realistic picture of your timeline and helps you spot potential bottlenecks early.
Realistic Use Cases for Everyday Projects
Imagine you are launching a new website. You could start by printing one sheet for the initial setup phase: securing the domain, selecting a platform, designing the layout, and writing core pages. As the project progresses, print additional sheets for content creation, testing, and launch week tasks. Each sheet becomes a chapter in your project story, and you can review them side by side to see how earlier decisions affect later stages.
Consider a wedding planning scenario. The early sheets might cover venue booking, vendor research, and guest list management. Later sheets handle dress fittings, seating arrangements, and final walkthroughs. The ability to add pages means you never have to cram a growing checklist into limited space. You simply print another page and keep everything organized.
For a small business launching a new product, the planner can hold research and development tasks on one sheet, manufacturing milestones on another, and marketing timelines on a third. By filling in the days for each task, you can identify where deadlines may overlap and adjust accordingly. This visual clarity helps you communicate timelines to team members or stakeholders without confusion.
Important Considerations Before You Begin
Before printing your first sheet, think about how you want to store the pages. A three-ring binder works well for the 8.5 x 11 inch version. A disc-bound system or spiral binding can also keep pages secure while allowing you to add or remove sheets easily. For the 6 x 9 inch size, consider a compact binder or a simple folder that fits in a bag.
Take a few minutes to decide how detailed you want your task entries to be. Some people prefer high-level milestones; others break work down into individual action items. Both approaches are valid, and you can adjust your style as you become more comfortable with the format. The key is to be consistent. If you start with broad tasks, keep that approach throughout the project to avoid confusion.
Remember that estimating how many days a task takes is a skill that improves with practice. The first time you use the planner, you might guess optimistically. That is fine. After a few cycles, you will develop a better sense of how long things actually take. The planner becomes a learning tool as much as an organizational one.
Why Minimalist Design Supports Better Planning
A cluttered planner can be just as distracting as a cluttered desk. The black-and-white minimalist interior of the Project Planner Note Book removes visual noise so you can focus on content. Without colorful borders or decorative elements competing for your attention, your eyes go straight to the dates, tasks, and durations that matter. This design philosophy aligns with the idea that a planning tool should serve your thinking, not complicate it.
Minimalist layouts also print faster and use less ink. If you are printing many sheets over the life of a project, this efficiency adds up. And because there are no color elements to match, you can print on any paper you like, from plain copy paper to premium stationery.
Bringing Everything Together
The Project Planner Note Book is more than a set of pages. It is a flexible system that grows with your work. Whether you are organizing a personal goal, a creative collaboration, or a professional initiative, having an expandable, printable planner gives you the freedom to plan exactly the way you need to. Start with one sheet, add more as you go, and build a complete timeline that reflects the real scope of your project.
By filling in dates, listing tasks, and estimating durations, you transform a vague idea into a concrete roadmap. The act of writing things down makes them more real and more manageable. And because you can always print another page, you never have to worry about running out of room. That is the kind of flexibility that makes planning feel less like a chore and more like a genuine advantage.